|
|
|
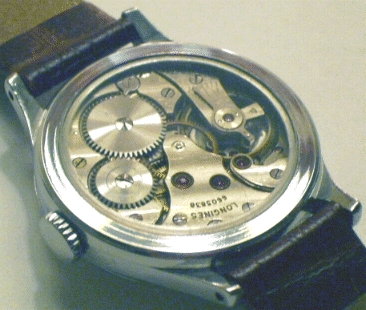
If you've ever wondered how hard it is to make a display or exhibition back for your watch, wonder no more. If you have access to a small, moderately precise lathe, you should be able to punch a hole in the back of your watch without too much difficulty. Let me say at the outset, though, that it helps to have a couple of garage sale specials to practice on before chucking up that solid gold Constellation back (!) (did I say that?...).
First Things First
Items you will need to complete the project:
- suitable watch back
- small three- or six-jaw lathe (self-centering chuck works good for me, although a four-jaw chuck may be better for certain case backs)
- mineral glass or sapphire crystal assortment
- adhesive (I use Seiko two-part crystal epoxy, part number S-310)
Two requirements to ensure a good finished product are: a case back that has sufficient thickness to allow a countersink cut so the crystal is inset some amount, and if your back is a snap-on affair, it should be heavy enough to provide flexural stiffness for the times when you need to remove the back from the watch. A thick screw-on case back is the ideal candidate for a display back conversion.
My third attempt to make a display back did not fare so well as the first two. The snap-on case back was simply not thick enough. The back didn't have enough meat to allow me to countersink the crystal, and the back stiffness wasn't sufficient to keep from flexing when removing the back from the watch case. It was necessary to reattach the crystal to the case back more than once. The ultimate solution was to carve out a complete case back from stainless bar stock, a minor inconvenience for a skilled machinist, but a 2 1/2 hour job for me. But that is another story, and I learned a couple things that I would do differently next time.
On To The Task At Hand
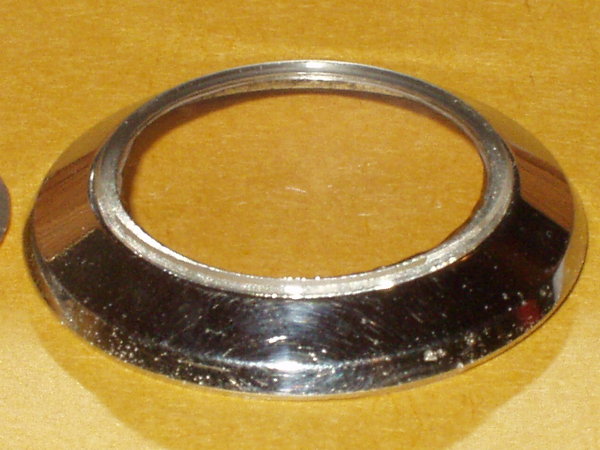
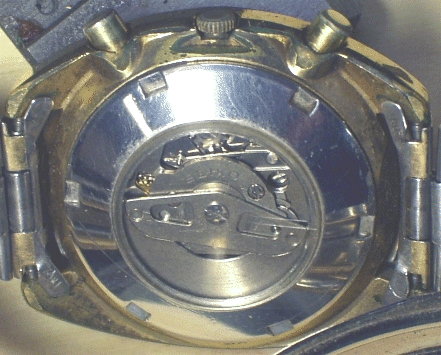
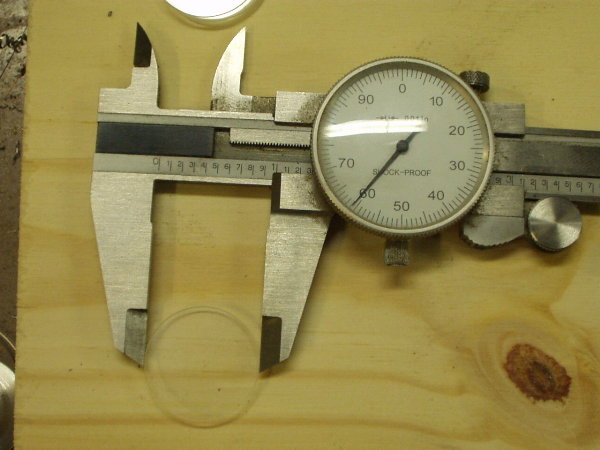
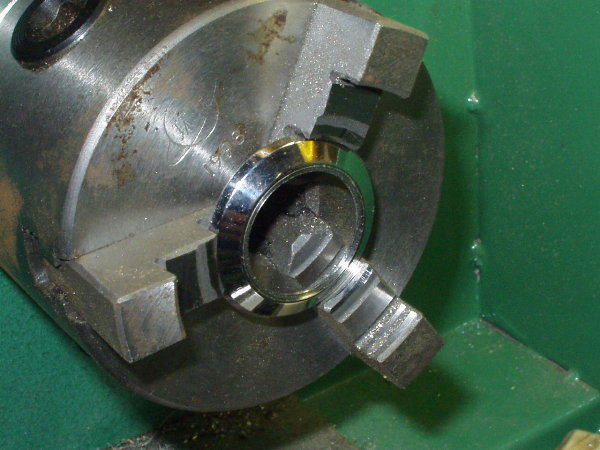
The first order of business is to measure the thickness of the case back, where the crystal will eventually be fitted. The thickness should be .020 minimum (thicker is better). The case back used in the following photos is from an Omega Constellation I did for a fellow watch enthusiast. The thickness of the case back was a hefty .032. Once the metal thickness is verified, various crystals are test-fitted to the case back, choosing the crystal that most closely matches the desired look.
Let The Cutting Begin...
The case back is chucked up in the lathe and spun to verify trueness. If the case back isn't parallel to the cross slide of the lathe, the countersink cut will be deeper on one side of the case back and may possibly break through.
Figure that the through-hole diameter should be about .060-.080 smaller than the diameter of the crystal. This gives a .030-.040 countersunk lip to support the crystal.
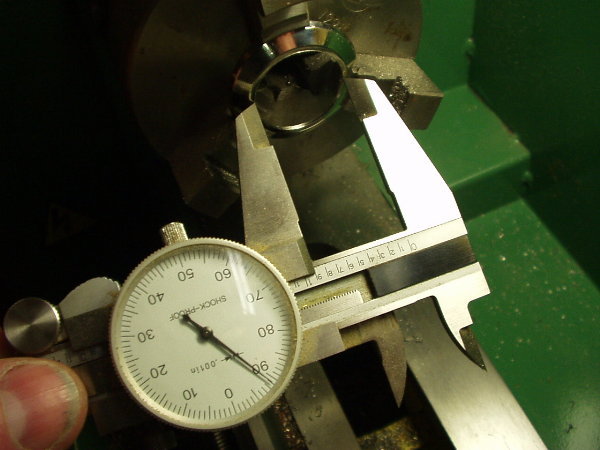
Position the cutting tool .030-.040 in from the diameter of the glass and make a slight cut into the case back all the way around. Move the tool away from the work piece and verify the hole diameter that will be cut. Double check all calculations, so no mistakes are made, such as cutting the hole too big.
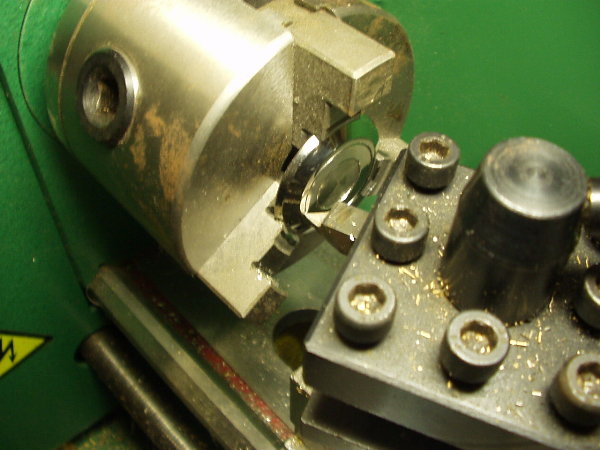
The lathe I use is a Harbor Freight 7x10 mini lathe with variable speed adjustment. My cutting tool is sharpened to about a 30-degree sharp point. I lock the carriage in place by engaging the threading half nuts (first making sure the lead screw is disengaged). The tool is then carefully fed into the case back using the compound slide positioned parallel to the lathe ways.
So Far So Good...
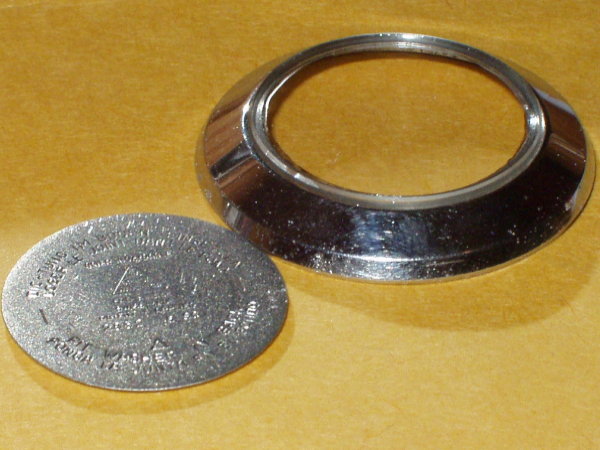
Once the hole is cut through, the cross slide and compound slide are repositioned to cut the step (countersink cut). The cutting tool is moved to the outer diameter of the crystal and the compound and cross slides are used to cut about a .015 deep countersink to accept the crystal. The countersink can be cut to any depth desired, but be careful not to cut all the way through the case during this machining operation, or you won't be happy.

Once all machining is complete, touch up the machined edges with a file or sandpaper to remove the wire edge left by cutting operations. Make sure everything is finished before removing the case back from the chuck or it probably won't get positioned exactly as it was originally. The case back is removed from the chuck and washed with soap and warm water to remove any residue. The crystal is also washed to remove contamination. The crystal adhesive epoxy is then mixed and carefully applied evenly and sparingly around the countersink. In the past I positioned the crystal above the case back and carefully dropped it into place, but with this Constellation case back, I did things differently. I used a short dowel slightly smaller than the machined hole diameter. The case back (with wet adhesive) was lowered over the dowel and the crystal was placed on top of the dowel. The case back was then lifted up to just under the crystal to line up case back and crystal. The case back was then lifted up and off the dowel, which set the crystal into the countersink more precisely than the drop-in method.
If You've Made It This Far, Congratulations!